Showing posts with label tips and tricks. Show all posts

Tips & Tricks: The network diagram of a blog

dataflow diagram of a blog - click for hires

For the bloggers and nerds amongst you...

In this post I explained in laymen's terms what RSS feeds are, and what they can do for you as a reader, and as a blogger.

In a more technical post, I explained some of the technical tools I use to "transform" RSS feeds to different platforms.

As with over 20 blogs and aggregation sites, 40+ bookmarking sites and link collectors, it was time to map it all out -- click on it for a high res view.

The interesting part, is that there are only just a few data entry points (marked with a typewriter icon), where I post blogs, or paste and comment on links. In some of them, it is even optional, as they are also automatically fed or cross posted...

My blogging tip of the week for you: RSS can make your blog more appealing, and your content more relevant for your users. The better you filter the RSS contents and the more selective you are in what RSS feeds to use, the better the output will be (the old "junk in, junk out" principle).

Two warnings:
- do keep track of all the links, and map them out as I did in this diagram, certainly if you start cross posting. It is easy to make a mistake and double post or make a cross posting loop. This will chase your audience away, as it looks sloppy.
- Be aware that any RSS feed (or any widget for that matter) you put on your blog, will make your site load slower. Keep the download speed up as much as possible. Tips on how to do that, you can read in this post.


More posts on The Road about blogging tips, technology, ICT or blogging in general.

Read the full post...

Tips & Tricks: What is an RSS feed and what can I do with it?

RSSThere are a number of ways that you can subscribe to or get automatic updates from "The Road". The main one that our readers use is our RSS feed. What is it, and what can it do for you, as a reader or as a blogger?


1. What is RSS?

RSS or "Really Simple Syndication" is a technology used by millions of web users around the world to keep track of their favorite websites. RSS is best described as a "news feed" one subscribes to. These days it is rare to find a website not offering RSS feeds.

In the "old days", the only way to keep track track of updates on a website, you had to visit the site regularly. You could to "bookmark" your favourite websites in your browser and manually return to them on a regular basis to see what had been added.

The problems with bookmarking is that it can get cumbersome when you are trying to track many websites at once, you might miss information when you don't check regularly and you do a lot of work in vain as the site might not have any new posts when you check it.


2. And then there was RSS

What if you could tell a website to let you know every time that they update? This is what RSS does for you.

RSS gets you the most up to date information so you can read it in your own time. It saves you time and helps you to get the information you want quickly after it was published.

It’s like subscribing to a magazine delivered to you periodically but instead of it coming in your physical mail box each month when the magazine is published, it is delivered to your "RSS Reader" every time your favorite website publishes updates.


3. How to Use RSS - Step 1: Get an RSS Reader

The first thing you’ll want to do if you’re getting into reading sites via RSS is to hook yourself up with an RSS Feed Reader.

There are many feed readers available. A couple are free, and are web based ones like Google Reader and Bloglines.

Both of these feed readers work a little like email. As you subscribe to feeds you’ll see that unread entries from the sites you’re tracking will be marked as bold. As you click on them you’ll see the latest update and can read it right there in the feed reader. You are given the option to click through to the actual site or move onto the next unread item - marking the last one as "read".

If you are more adventurous, you can also use more customizable readers like MyYahoo, MyGoogle, MyMSN, Netvibes, Pageflakes or Newsgator.


4. How to Use RSS - Step 2: Find the RSS feed on your favourite sites

There are two places to look for a site’s feed on the website and in your browser.

For On-Site subscription, you need to look for some of the small buttons and widgets published on your favorite sites and blogs. Little orange buttons, "counters" with how many "readers a blog has", links called RSS, XML, ATOM and many more. They come in all shapes and sizes. Here are a few you might have seen:

rss-buttons

In most cases it’s as simple as either copying and pasting the link associated with the button into your RSS Reader or clicking the button and following the instructions to subscribe using the feed reader of your choice.

On The Road, I stored the most popular RSS newsfeed subscriptions all on one page.

But nowadays most browsers make it easy for you to subscribe. When you surf a site you can see if it has an RSS feed by looking in the right hand side of your browser's address bar (where you type in the site’s URL):

RSS in Firefox

RSS in Safari

To quickly and easily subscribe to a site, simply click on these icons. You will have to to set up your browser for your favourite news reader, such as "Google Reader" or "Bloglines", though!

Once you’ve done this and have subscribed to a few feeds you’ll begin to see unread items in your Feed Reader and you can start reading.


5. Don’t want to use an RSS Reader? Try updates via Email!

If the above explanation all just seems a little too complicated, or if you want to read your site's updates offline, subscribe to RSS feeds via Email.
On The Road, check the subscription widget in the side column, or you can subscribe to Emailed updates right here:

Enter your email address


You can unsubscribe at any time, your email will be kept private and not used for any other purposes than to send these daily updates. No spam, guaranteed! Here is a sample of an Email update.


6. RSS In Plain English

A video summarizing this post, from the famous series "In Plain English"


7. If you are a blogger, what does RSS mean to you?

Apart from your own RSS feed, which allows your readers to keep more easily up to date about your site, you can also re-use feeds from other sites.

Why would you do that? Well, it does spice up your blog. Look in the side column of The Road, there are quite a few RSS feeds I use. One is for the most recent comments people left on The Road (the comments are an RSS feed), my most recent Tweets, and the latest humanitarian news articles.

On my other sites like The Other World News, AidNews or NewsFeeds, I use RSS feeds extensively. In this post, I explain the technical background of how I manipulate and tweak feeds before I.. well... "feed" them into a blog.

Have fun!

More Blogging Tips & Tricks on The Road.

This post was inspired by ProBlogger, an endless resource for the serious blogger.

Read the full post...

Tips & Tricks: You might not recognize your blog

where kids come from

When I started this blog, I was naive. I thought I knew. I believed in technology. I thought the way I saw my blog was how everyone saw it.

A bit like when I was a kid. Then I thought when I would keep my hands over my eyes, nobody else in the world could see, because I could not see.

Same with my blog. I thought what I published, all of you would see the posts I would see it.

Now I know better. Now I know one thing: "I know nothing". And maybe that I will never know. And the fact that for the user, IT technology sucks.

What am I talking about? Internet browser compatibility!

Two years ago, I only used Internet Explorer. Until a friend told me that some of my posts looked weird on his computer. Text formatting around pictures was screwed up. Some widgets did not show correctly. Some stuff clearly ran outside of the main column. He showed it to me and "Yak!", he was not kidding.

He used Firefox. I had never heard of Firefox before (I told you I knew nothing!). I looked at my web statistics and found out quite a lot of visitors used Firefox. So a lot of people saw my blog differently than how I saw it.

So I downloaded Firefox, and from then on, I checked my blog both on Firefox and Internet Explorer.

Until another friend told me some of the stuff on my blog looked weird. I checked, and it did look weird. He used Safari on a Mac. I downloaded Safari.

Just in the last couple of months, I changed the layout of this blog significantly. Added drop-down menus, collapse/expand features, changed fonts, colours, template layouts,... And I tell you, it would take me typically a couple of hours to make the change, but two days to ensure it looks right on different browsers.

I can now understand the agony professional web developers have to go through during the final browser-compatibility testing. At work, we are developing a big portal website. And the developers are running past their delivery deadline. Why? Browser compatibility problems. Drives them nuts. And me too.

So nowadays, I check everything I publish on my blog in Internet Explorer 7, Internet Explorer 8, Firefox, Chrome, Opera and Safari. Why? Because The Road's web statistics from the past few months show me this is what you use:

Internet Browsers - what you use

The worst is Internet Explorer. The worst of worst is Internet Explorer 6. I don't even check it anymore. It is hopeless. The only hope I have is that my visitors as sensible enough to either upgrade to Explorer 7, or to use a decent browser.
Besides formatting problems, Internet Explorer is slow (as I showed in the past) and often seems to get stuck while waiting for a page to load. Bleh!

So my tip for the serious blogger: Download the most popular browsers and test your site. The more features you add, and the more advanced those features are, the more thorough you have to test in different browsers.

Oh, and tip of the week: Try BrowserShots, a website that generates a screenshots of how your site looks like on dozens of different browsers, and on the different operating platforms (Windows, Linus, Mac).

Have fun, and I hope you don't get too many nasty surprises.

PS: If any of you experience problems viewing The Road, just comment on any post! As I said: "I know nothing!", so comments more than welcome! You can also help me with feedback on two different collapse/expand features, see also this post on The Road's discussion forum


More blogging tips and tricks on The Road.

Cartoon courtesy MediaWatch India

Read the full post...

Tips & Tricks: Changing the favicon on your blog

school illustration

A favicon is the web nerd's name for the small icon shown next to URL in your browser's address bar, tabs or bookmarks. For example:

what is a favicon 2

what is a favicon 1

Favicons are a way to customize your blog, and make it stand out from 'the next one'.

Interested? There are three steps to take to change the favicon for your blog:
- Create the favicon itself
- Host the favicon on an external image hosting service
- Change the <head> section of your blog


1. Create the favicon

Favicons are "icons", small images with a specific file format, different from .jpg, .png or .gif. They have the ".ico" file extension, e.g. "theroad.ico".

There are several online tools available to convert an image from the most popular image formats to an icon. I use the one from DynamicDrive.

You achieve the best results by using a square picture without too many details or colours as it will be reshaped to a 16x16 pixel format.

As a favicon is a "public relations" tool for your blog, use an image that somewhere typifies or represents your blog.

After uploading your original to DynamicDrive, click on "Create Icon" and you will see in the preview how your favicon will look like after you have done the next steps.

First, click 'Download Favicon" to store it on your computer. On DynamicDrive, the file will always have the format "favicon.ico" or (if one already exists) "favicon(1).ico" etc..


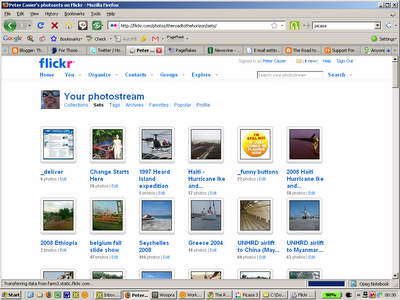
2. Host the favicon on an external image hosting service

The favicon needs to have the ".ico" extension. Most of popular image hosting services do not support images of the ".ico" format, so you won't have any joy using Flickr, ImageShack, XS.to, TinyPic etc.. But here are a few free image hosting services that do support ".ico" files: Oogletoogle, PicPanda, ImageBoo and CDMazika.

After you upload your favicon, the hosting service will give you a URL, refering to your picture, e.g. http://images.cdmazika.com/images/2f2stqn1k1p7diu5y6qs.ico

Make sure you don't loose that URL!


3. Changing the <head> section of your blog.

This is a bit tricky, as it changes slightly from blogplatform to blogplatform.
Bottomline is: you need to edit the HTML template of your blog to either change or add a line.

How you get to the HTML template of your blog, depends on your blogplatform.
On Blogger, you go to Layout>Edit HTML> and click on 'Expand Widget Templates'
On Tumblr, go to the Dashboard>'Customize'>Theme

Before you do anything else, PLEASE take a backup of your template. A corrupted template is one of the worst thing that can happen to a blogger.
Blogger lets you download your template, but in Tumblr e.g. you will need to copy/paste it into Notepad.

Anywhere between the <head> and </head> codes, look for something that defines your current favicon. It will look like this:

<link rel="shortcut icon" href="/directory/faviconame.ico"/>

("faviconame.ico" might have another name (ending in ".ico"), or contain a variable.

In Tumblr, the HTML line looks like this:

<link rel="shortcut icon" href="{Favicon}"/>

Blogger, on the contrary, does not store the favicon in the HTML code (as they always use the standard blogger favicon).

Now you need to either change that line of code (if it exists) or add one (if the favicon is not defined in your HTML template).

In Tumblr:

<link rel="shortcut icon" href="http://images.cdmazika.com/images/2f2stqn1k1p7diu5y6qs.ico"/>

In Blogger (mind the SINGLE quotes) add this line:

<link rel='shortcut icon' href='http://images.cdmazika.com/images/2f2stqn1k1p7diu5y6qs.ico'/>

Make sure you use the URL given for your .ico file.

Save the template and "Klaar is Kees". You are ready...

happy

Pretty amazing stuff, no? :-)

Note you might need to restart your browser or empty your browser cache before you see the favicon (Internet Explorer is particularly bad at refreshing the favicon).

More blogging tips on The Road.

Read the full post...

Tips & Tricks: 10 free blogging tools I use daily

Here are 10 free tools I use almost daily for my blog.

1. Picasa

Fullscreen capture 09122008 002948

Via my brother Kris, I learned the benefits of Picasa, a free download from Google. Picasa lets you store all pictures on your hard drive in a library and perform basic editing like cropping, tone adjustment and watermarking. But I use it the most to compress pictures in size and quality before posting them on my blog so the download speed is reduced.
Picasa also allows you to synchronize all your pictures with your online library.


2. Flickr

Fullscreen capture 09122008 003013

I store all my picture on Flickr a free online service by Yahoo. They have a small tool which lets you right-click on any picture to add it to an upload batch. Pictures are organised in folders and refered to by an URL. Flickr provides basic online editing with Picnik. You can publish pictures for the whole Flickr community allowing comments, grouping,...


3. Google Analytics

Fullscreen capture 09122008 003145

There are many free web statistics tools available, but the most well-featured is probably Google Analytics. It provides deep analysis of your blog visitors, top content, referral sites, search keywords, etc.. All data can be displayed in a wide array of graphs and can be exported in a spreadsheet or PDF.


3. Woopra

Fullscreen capture 09122008 004251

For a different flavour of web activity monitoring, try Woopra. While still running in Beta, this tool monitors activity on your blog or website in real time. It consists of a small script on your page and a downloaded tool for your PC.
Woopra shows your visitors as they come in (with all usual details such as browser, country, referral site, etc..) and navigate through your site, tracing the visited pages.
More than a curiosity or a 'big brother' tool, Woopra comes in handy e.g. to check which of your posts propagate visitors through your site rather than have them bounce off after the first read.
Woopra also offers the standard summarized and graphed page visits, referrals, user characteristics,.. but in real time. Handy comes in the user tagging tool, alerting you when a particular user comes in. Allows you to catch the spammers.


4. A menu bar generator

Fullscreen capture 09122008 011559

The drop down menu bar you see atop this blog, is made with the CSS Menu Generator by WonderWebWare. Through an interactive freeware, you customize your menu layout, style and its links, after which it generates the HTML/CSS code, which you can cut and paste into your template.

One tip: While the Menu Generator lets you save your menu for later changes, it does not store the styling of your menu, only the structure. I work around it, by saving the HTML in a text file, and when I do updates, I cut and paste the part of the structure only.


5. Feedburner

Fullscreen capture 09122008 011841


Feedburner is probably the most powerful and commonly used feed tool. It allows you to customize your feed, to keep track of your feed users, provides a wide range of tools allowing users to integrate your feed into their favourite reader, and has a 'subscribe to this feed by email' function.


6. Backlink searches and page ranking

Page Ranking

Going into the "Nerds" category :-)

As for any website, a blog gets a Google pagerank, a point of measure of the "importance" of your blog in the blogosphere and the Internet itself. Google uses pageranking to "prioritize" sites when a user searches for certain keywords. The pageranking algorythm is based, amongst others, on the number of people link to your blog.

I use prchecker to monitor the blog's pagerank.

To monitor the backlinks, I use mainly three tools:
- Google backlink checker
- Yahoo Site Explorer backlink checker
- Google Blog Search

Some curiosities to measure your "penetration" in the blogosphere:
- Trifecta
- Website Grader


7. Manipulating RSS feeds

Yahoo Pipes

I wrote before on the use of Yahoo Pipes and NewsGator, two tools I use to aggregate, customize and reformat RSS feeds.
On The Road, I use them for the comments feed, and the humanitarian news feed in the right column.
On The Other World News, Newsgator is used to generate a script searching all aidnews feeds and display the latest.
Yahoo Pipes you can see in action on my "meta" blogs: AidBlogs, For Those Who Want To Know and AidNews... All together, about 100 different blogs and other websites are re-mixed, summarized and re-published for a reader to get an overview "what's up".


8. Gadgets and widgets

Google Gadgets

Google offers a wealth of gadgets you can use on your blog. From tickers counting down to a certain date, local weather forecasts, related YouTube videos, Quotes of the Day, jokes to games. I use Google Gadgets for the translation widget in the right column.

Another great resource is WidgetBox, featuring thousands of widgets. They also make it easy to make your own.

Keep in mind though, the more widgets you add to your blog, how slower your page will download. So keep the tips I published in this post in mind.


9. Google and Yahoo webmaster tools.

Yahoo Site Explorer

Google Webmaster Tools and Yahoo Site Explorer are two essentials for webmasters. Both require you to register (no fees), and facilitate the overview of how crawl robots look at your site, check backlinks and outdated links on your site.


10. Buttons, icons and badges

Buttons

Buttons, icons and badges are a great way to make a link to a service, a page or a function on your blog with a graphical interface. The two tools I use are Brilliant Maker and CoolText. Free and easy to use.

More blogging tips and tricks on The Road.

Read the full post...

Tips & Tricks: How to measure pixel width on your blog?

On a blog, like any web page, everything is measured in 'pixels', the smallest unit of measure on a screen. So if you work with the layout of your blog, you need to have a precise idea of the pixel height and width of the different elements.

ruler

The other day, I was tweaking my blog, an had to measure the size of images and columns. Painstaking. Until I found Pixel Ruler, a freeware from Tahionic.

Pixel Ruler displays a simple ruler, either vertically or horizontally, you can grab and move around your screen.

You drag the ruler as an overlay over your screen and 'hold' it over any open window. It has a transparent colour making measuring different bits and pieces fast and precise. You can easily shorten or expand the ruler.


more tips and tricks for bloggers.

Read the full post...

Tips & Tricks: Matching Colours on Your Blog

I had a lot of trouble matching backgrounds of frames, widgets etc.. to the background of my website. I could only find matching colours after hours of trying... Until I found this free tool: Colorpic.

ColorPic

It is a simple and free Windows program that lets you zoom into any area on your screen - including into your browser window. With a magnifying glass, you go over an area, and it tells you the hex value of the colour on that spot of your screen.

Matching colours became a breeze for me.

Have fun.

More Blogging "Tips and Tricks", you find here.

Read the full post...

Tips & Tricks: How to speed up your blog

Speed up your website!Just like many blogs, The Road to the Horizon grew from a blog with a simple plain template to what it is now: a site combining pictures, links, widgets and text.
Came a time, a few weeks ago, I realized it took almost 30 seconds to fully download the homepage of my blog, on an ADSL or cable connection. Around the same time I travelled to Addis Abeba in Ethiopia, and was surprised to see it took over two minutes to download my page when one had more limited connectivity.

Why is speed important?

Many visitors will come to your blogsite “by accident”, through a referral link or more commonly, through a Google search. In just a few seconds, these “incidental visitors” will decide whether your site is interesting or not. In just a few seconds, they will decide if they will stay, or not. We also have just a few seconds to turn him from an occasional (or unique) visitor to a regular ‘customer’, someone who will come back, bookmarking your blog, or even post it on social networks.

A couple of factors are important in this ‘flash’ decision “will I stay or not”:
1. the overall appearance or impression of the site (which they will evaluate on what they see on the top screen without even scrolling down), and
2. the download speed.

The download speed became even more important when Internet Explorer versions 7 and 8 seems to ‘block’ for seconds, while in the middle of download if they need to wait for certain widgets to complete.

So, I had to improve my download speed. Here is what I have learned:


1. Benchmark your site’s speed

Measure the speed before and after you make the improvements. Try selfseo.com (which specifies if a page doesn't load within 5-8 seconds according to their benchmark you will lose 1/3 of your visitors.) or linkvendor.com or for a more in depth analysis, use websiteoptimization.com.

Each time you change something on your site, measure what difference the change made.

Two good tools to find out what specific parts (widgets, images, scripts,..) are slowing down your site, two great tools are Firefox Firebug and the Chrome Developer tools .
Firebug is an add-on to Firefox (download here). The Chrome tool comes built-in (goto menu>developer>Javascript console and click on Resources).


2. Slow items go last:

Have a look in what sequence your blog loads. E.g. in the case of The Other World News, the sequence is:
1st the header
2nd the left column
3rd the middle column with the posts
4th the right column
5th the bottom banner.

In the case of The Road, the sequence is:
1st the header banner
2nd all blog posts with the pictures
3rd the whole right column (darker grey), item per item.
4th the bottom banners (darker grey)

This means, if I would put something in the banner or in any of the blog posts that would not work properly, or would be slow, the rest of the page’s download will slow down.

An example:, I had a widget which often had speed problems, as one of the first things to download on The Road’s right column. It often kept the whole download of the rest of the right column on hold for at least 10 seconds. I moved that widget to the part of my page which loads last (the bottom), for visitors not to notice the delay.

Recommendation: ensure you put the slower widgets, or those taking a long time to load, at the end of your download cycle.


3. Compress your pictures.

Most people think because they use small pictures, these automatically take little time to download. Not necessarily so. It depends on the data-size (kbytes) of your picture.

Check your pictures by right-clicking on them and select ‘Properties’.
A typical 400 x 300 pixel picture should not take more than 20-40 kbyte. Often people use > 100 kbyte. A couple of those pictures and your download speed will be a killer.

I posted before about ShrinkPic, a tool I used to compress pictures, but lately I use Picasa, a free picture library and processing tool that lets you export pictures with predefined pixel size, quality and compression rate. The visual quality of compressed Picasa pictures is very good (and much better than with ShrinkPic tool I used before.

Pay particular attention to your banner: because banners are often larger than normal pictures, and is the first thing your page will download (and the first thing the users will see), compressing it is critical (The Road’s banner is 12 Kbyte, as an example). There is nothing as frustrating for a user than to sit and wait for a banner to download.


4. Limit your widgets

This has been a killer for me. I loved to add little gimmicks – “widgets”, that showed the ‘latest visitors’, or “the weather where I am”, or “the latest comments”, or “all countries of the latest visitors”, etc..

That killed my speed. I could see so, when using Mozilla’s Firefox to download my page, and to observe what Firefox was waiting for (check the bottom left of the Firefox window)…

Recommendations:
a. Limit the number of of gimmicks and widgets
b. Delete those widgets which are slow
b. Those which are slow, and you really really wanted to keep, put at the bottom of your page (or whatever part of your page which downloads last – see point two).


5. Store widget and badge icons on your picture server

Often, widgets or badges (like this one ) come by default with the “img” link to an icon stored by the service you are referring to.

I had a lot of these on my site (e.g. in the syndication part at the bottom of my page), and found out that in average at least one of these services would be down or slow, thus slowing down MY page…

The remedy is to store these icons on your trusted image server (e.g. Picasa or Flickr).
How?
1. You rightclick on the icon as you have it on your page
2. Choose ‘Save as’
3. Then upload that image to your picture server
4. In the "IMG" tag, replace the URL of the picture with the one on your picture server.


6. Limit or speed up RSS feeds

I RSS feeds to show the latest news bulletins or to display the latest comments on my blog. Feeds take some time to download, and not all servers are fast.

The speed of my site increased quite a bit when I moved the feeds onto Newsgator, a free feed service. They are fast and reliable. You can quite easily combine your feeds with free Yahoo Pipes.

Have fun!

Check out more blogging tips and tricks on The Road.

Picture courtesy vintage-poster.info

Read the full post...

Tips & Tricks: Displaying Special Characters

You probably had instances where you need to display a piece of HTML code 'as is' on your blog, or where you need to use special characters like '<' or '>' etc..
Internet browsers easily get confused and often interpret these special characters as HTML code, resulting in goobledegoock displayed on the screen.

You might have discovered already that, to display special characters, you need to replace these with a code, prefix-ed with '&', called 'encoding'.
So if you want:

<a href="http://theroadtothehorizon.blogspot.com"> The Road to the Horizon</a>

to be displayed as is, on your page, it would have to be encoded like this:

&lt;a href=&quot;http://theroadtothehorizon.blogspot.com&quot;&gt;The Road to the Horizon&lt;/a&gt;

Check out this reference article listing all the special characters.

But, this becomes really cumbersome if you want to display whole lines of HTML code or a piece of text with a lot of these special codes in it. Here is a tool I use often to translate those coded passages with special characters.
Just cut and paste your text, as you want to have it displayed in the browser of your visitors (including all those special characters) onto the form in this page, and hit 'encode'. Copy and paste the resulting special code into your blog. Et voila! Finished!

Hope this helps.

Peter

More Blogging "Tips and Tricks", you find here.

Read the full post...

Tips & Tricks: From RSS feed to blog (or: "yes, I am a nerd")

Both for work, and in my spare time, I scan the news (and the Internet as a whole) for humanitarian and development articles.

Up till recently I exclusively used PageFlakes, a simple tool allowing you to display a multitude of RSS feeds from different websites on one page.

pageflakes

This gave me an instantaneous overview of what is being published in the world. But, it needed me to visually scan the different bulletins. And I had no history: once a news source is refreshed, new items come up and old ones are popped off the list. You missed it, too bad...

It displayed "any news", not just humanitarian news. I could not really filter out contents of interest to me.

So I made The Other World News, which aggregates news from different sources, and displays it in a straight text format.

The Other World News

That works well and displays only the latest humanitarian news. But, once again, it did not store the data, it was "only" a sophisticated way to display the latest (humanitarian) news.

So I still needed something more. A way to keep all news posts stored, so it was search-able, tag-able, re-use-able... And this is the piece where I am very pleased with myself. Ha! A nerd's mind is easily filled...

The fruits of my labour, you can see on For Those Who Want to Know and AidNews.

for those who want to know

Aaahh. Now we are talking:

AidNews gives the humanitarian news (only). Each feed item is automatically stored as a summary, with a link to the original press article. Occasional pictures go in it too.

For Those Who Want to Know does the same, but the sources are now blogs, humanitarian sites, press releases from development organisations, etc....

And while I was at it, AidBlogs aggregates summaries of the latest blogs from aidworkers.

Those of you following "The Road" regularly, know I have been working on these three sites - I call them my meta-sites - since a while... It is only about now I have it working as I want it. Took me sweat, blood and tears.

Because I am a humanitarian nerd, I have to tell you how it works. I just gotta...

  1. I located about 100 300 online news sources, giving me ONLY the topics I need
  2. I take the RSS feeds of all these sites and used NewsGator to combine all of them into several (new) RSS feeds (one feed per type of news source).
  3. I combine all of those into one feed, filter out formatting problems, delete duplicate news items, and take out only the most recent 30 posts, using Yahoo Pipes. Now talking of nerd-tools, this is a good example! But with a great user interface:

    My Yahoo Pipes

  4. I import this (new feed) into Tumblr, a very simple but powerful blogging platform, to re-publish the posts.
That gives me what I want: every hour, I get about 40 new news articles in one blog. Automatically...!

So, tell me. Am I a nerd or what?


More posts on The Road about blogging tips, technology, ICT or blogging in general.

Read the full post...

Tips & Tricks: Text within a Scroll bar

HTML is really much easier than it looks. Ok, let me re-state that: when publishing a blog, the groundwork is already done for us. We are left to play with the goodies: fiddling around with the text and images. And fiddling we do!

Someone asked me how to put a text within a scroll bar. Like this:

your text goes here. Actually, you can include anything you want: a picture, text, video etc...
sunrise march 2007

Using scrollbars is any way to put a lot of information, which is not relevant to your actual text, within a limited space


The HTML code for the scroll bar above is:

<div style="border:1px black solid; width:300px; height:50px; overflow:auto;padding-left: 4px; ">
your text goes here.
</div>

You can easily expand the div with other features, bells and whistles.

More tips and tricks for bloggers, you find here.

Read the full post...

Tips & Tricks: Scrolling Text in a Frame. A Ticker Box!

I wanted to put the latest updates and some statistics of my blog in one of the side columns, but hated the amount of space the text took up.

For quite a while now, I tried to find a simple way to put scrolling text in a box, often called a 'ticker', as that seemed a nice way to condense the space the information took up.

You can find several ways to do this, often involving scripts etc.., but the simpliest I found is by using a 'marquee'.

A marquee begins <marquee withsomequalifiers> and ends with </marquee>. Everything inbetween will be displayed 'in a scrolling way'

Some simple tutorials on the use of marquees, you can find in the HTML code tutorial and on HScripts.

...But it is really easy. The one I use on my page is:

<marquee onmouseover="this.stop();"
style="BORDER-RIGHT: 1px solid;
PADDING-RIGHT: 4px;
BORDER-TOP: 1px solid;
PADDING-LEFT: 4px;
PADDING-BOTTOM: 5px;
BORDER-LEFT: 1px solid;
PADDING-TOP: 5px;
BORDER-BOTTOM: 1px solid"
onmouseout="this.start();"
scrollamount="1"
hspace="5"
vspace="5"
scrolldelay="100"
direction="up"
width="247"
bgcolor="#eeeeee"
height="40">

<center>
This is your text<br/>
<a href="http://theroadtothehorizon.blogspot.com">Or put a URL in it!</a><br/>
but you can add whatever you want!</br>
</center>

</marquee>

and this is how it looks like:

This is your text
Or put a URL in it!
but you can add whatever you want!


As you can see, the qualifiers are simple and self-explanatory. You can basically define everything from the width, height, background colour, framesize/colour, to the direction of the text-scrolling, scrolling speed etc...

Note I used the onmouseover and onmouseout functions within the marquee definition. This is a bonus. Both functions ensure the scrolling stops if you put the mouse within the area of the marquee. I used it so that people can click on one of the URLs I defined, which refer to a shortstory.

Have fun!

Peter

More Blogging "Tips and Tricks", you find here.

Read the full post...

Tips & Tricks: A Guestbook with Buttons

This summary is not available. Please click here to view the post.

Read the full post...

Tips & Tricks: Compressing Pictures For your Blog

One of the things that attracts people to a blog is the use of good pictures. The downside is the more pictures you use, the slower the pages of your blog load. The slower pages load, the faster people will leave your blog.

Most of the pictures I use, are originally 100 to 200 Kbyte. I would have an average of about 10-15 on the 'home page' of my blog. Each of them is stored on Flickr.
I use either ADSL or cable for my Internet connection, but even then, I could see the time delays in loading the pictures. Google Analytics, which I use to track my blog statistics, shows me that most of the people visiting my blog use T1, ADSL or cable, which 'minimizes' the download delays, but 10% still uses dial-up lines. Good enough reason to ensure the pages download fast.

For months, I fiddled around with different picture packages to compress images before publishing them. It was a lot of manual work, to reduce the resolution and the dimensions to make a real difference, and often the result was not the quality I wanted (better no pictures than bad pictures), or was just too much of an effort (hey, I have a day job too, you know! ;-)). If you visit some of my pre-2008 posts, you will see what I mean. (I wished I had the time and courage to resize all of those pictures!)

I stumbled upon ShrinkPic, from Onthegosoft which helped me to resize pictures easily.

shrink pics screen

It is a small (1.1 Mb) shareware tool, originally meant to automatically compress (or shrink if you will), pictures you send via Email. However, ShrinkPic also lets you drag and drop a picture onto its menu window, which then opens a new screen with the picture compressed to your liking: 15-50 Kb, 50-150 Kb, 150-450 Kb or any custom size. You "File-Save As" and you are done.

Here is an example of how the results look like:

This is the original picture (61 Kb):
Sunset uncompressed

Here is the compressed picture (35 Kb):
Sunset compressed

Not much of a difference in quality, right?

One word of caution: if, as I do, you use Flickr to upload pictures onto your blog, keep something in mind: Flickr resizes the pictures based on which size option you use to download. Make sure you use Flickr's 'original size', and resize the picture in your blog (by editing the HTML, or whatever WYSIWYG tools you gave) to your liking. Otherwise, you might see a 35 kb picture coming out as a 150 Kb picture, even though it is smaller on the screen...
So a word of wisdom: after you published a picture, always use "right-click/properties" on the picture to double check the actual size on your page..

Kudos:
I discovered ShrinkPic through Aid Worker Daily, a site dedicated to "to improving the lives of others through the appropriate use of technology."

Read the full post...

Tips & Tricks: Have Your Blog Make a Difference!

I don't know about you, but I want to use the "soapbox opportunity" my blog offers, to "make a difference in this world". That is not just in the content of the posts I write, but by making some publicity for the good causes". You have probably seen these icons in the right column of my blog:

Sign Amnesty International's pledge on Internet freedom

Support Amnesty International


Well... if you are interested in re-using some of these icons (with the links), here is the HTML code for them. Feel free to copy/paste, and alter the code as you see best fit for your blog!

<center><small>

<p><a href="http://irrepressible.info/pledge" target="_blank"><img border="0" alt="Sign Amnesty International's pledge on Internet freedom" src="http://farm3.static.flickr.com/2151/1964428866_ef20405ee7_o.gif"/></a>

</p><p>

<a href="http://www.amnesty.org" target="_blank"><img border="0" alt="Support Amnesty International" src="http://www.amnesty.org/images/banners/banner1-grey/banner1-120x60-eng.jpg" title="Support Amnesty International"/></a>

</p><p>

<a href="http://www.freerice.com/" target="_blank" title="A word game. For each word you get right, they donate 10 grains of rice!"><img border="0" alt="" src="http://farm3.static.flickr.com/2310/1935145691_f561cc4cfb_s.jpg" title="A word game. For each word you get right, they donate 10 grains of rice!"/></a>

</small></center>

More Blogging "Tips and Tricks", you find here.

Read the full post...

Tips & Tricks: Get the FreeRice.com icon

I wrote before about the free vocabulary game, Free Rice, which donates 20 grains of rice for every word you get right. Here is the HTML code to get the icon, with the embedded link to the Free Rice site, onto your blog:

<a href="http://www.freerice.com/" target="_blank"><img title="A word game. For each word you get right, they donate 20 grains of rice!" style="FLOAT: left; MARGIN: 3px 5px 0px 2px; CURSOR: hand" alt="" src="http://farm3.static.flickr.com/2384/1979936472_bebab55e6b_o.gif" border="0" /></a>


Copy and paste this code onto your blog, and you are part of a fund raising effort, which has a real impact!

Read the full post...

Tips & Tricks: How to Post a Video on Your Blog?

It seems many people are still struggling on how to post a video to their blog.

It is really simple, actually. If an HTML/RSS/CSS-challenged person like me can do this, then so can you!

If you have a video on your computer you would want to publish, the first thing you need to do is to upload it to a video sharing site. I use YouTube. Registration is for free, and the reliability is good.

If you want to publish your video, or any other video from YouTube (or an other video sharing site), you need to look for something which is labeled as "Embedded Code". It is a line of code which looks like this:

<object height="355" width="425"><param name="movie" value="http://www.youtube.com/v/xt9dCRc5l_Q&amp;rel=1"><param name="wmode" value="transparent"><embed src="http://www.youtube.com/v/xt9dCRc5l_Q&rel=1" type="application/x-shockwave-flash" wmode="transparent" width="425" height="355"></embed></object>

This is a lot of cryptic stuff, but don't worry about that: You copy and paste this code into your blog's post. Make sure you are in HTML-editing mode, otherwise you will get garbage.

You can reduce the size of the video-window by editing the two parameters
width="425" height="355".
Make sure you reduce both width and height proportionally (divide by the same amount), otherwise the video will be stretched in one direction, and will look distorted.

To make it look nice, you can put the video code between the HTML tags <center> </center> to center the window on your blog.

Here is the video whose code you find above:


Here is the same video with height and width reduced by 50%:


More blogging tips and tricks you find here.

Read the full post...

Tips & Tricks: Free blog directories

serious reading

One of the ways to "get your blog known to the world", is to list it in blog directories. Bloggeries made an extensive list of blogdirectories, ranked in importance, based on the Trifecta ranking tool.

Here is an extract of the top free blog directories (and their ranking):

83 blogcatalog.com
62 blogpulse.com
55 blogged.com
54 dir.blogflux.com
51 globeofblogs.com
50 bloghop.com
48 blogexplosion.com
48 bloggernity.com
48 topblogarea.com
43 blogrankings.com
42 lsblogs.com
41 weblogalot.com
40 blogdirs.com
40 bloggapedia.com

You can also check out this list of blog directories featuring The Road to the Horizon.


Check out More Tips and Tricks for bloggers on The Road.

Read the full post...

Rumble: Will Blogging Get You Fired?

Possible subtitles for this rumble:
  • “What have Jan Pronk, the UN Secretary General’s Special Representative to Sudan and Ellen Simonetti, an attractive young flight attendant have in common?“ (And it is not what you think, you dirty minds, you!)
  • “The conscience struggles while standing on the soapbox”
  • “The Day I met the Terrorist Organisation, to Publish or not to Publish?”
  • Or maybe just “Ramble, rumble and the sorts. A Retrospective Trip Into a Trouble Mind!” :-)

My fifteen minutes of fame.

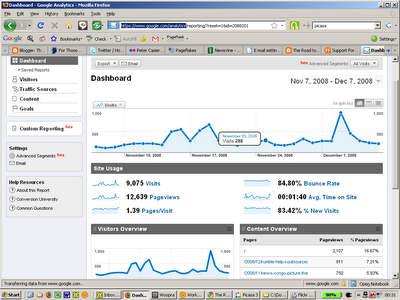
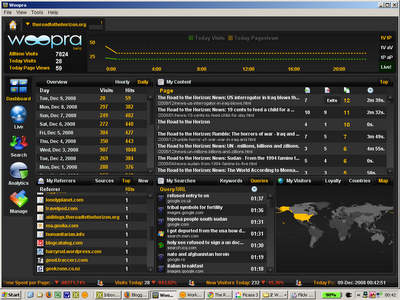
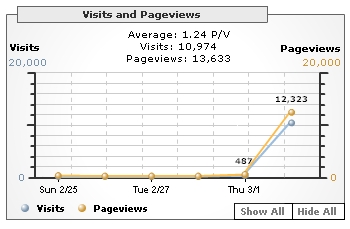
This website is now about 6 weeks old. Born out of the lust to (finally) publish my short-stories. And flattered by the response from the readers. It is always nice to do something, that others find interesting. Little was I prepared for what happened this weekend. Normally the counters in the right column show me an average of two to three users online at any given time. I knew something was different when last Thursday night (eh, Friday morning 2 AM), just before going to bed, I saw 70 users online at the same time. Mapstats showed me the users were mainly referred to by a German and a US based Internet news-feed site. It seemed the story of
The Day I Got Deported from the US was (finally) picked up by the masses. In the next 24 hours, instead of the usual 500-600 pages visitors read per day, I got a record page view of 12,000.


My reactions: (sometimes it is interesting observing one’s self)
  • Flattered. I had written something that people were interested in. 93% of the 490 people who filled in the poll at the end of the article, rated it as 'Excellent'). I was no longer alone out there in the Blogosphere (sniff), talking in the void (“Helloooo, anyone out there listeniiiing?”)
  • Two seconds later: I was busy for the next four hours moderating comments people posted about the blog, which started to stream in. All were published beneath the story
  • Four seconds later (while trying to keep up with the comments): I thought “Oh Shit”. I hope this is not going to get me into trouble. Then again, this story, like all of my short stories, are non-fiction. And particularly for this one, I tried to state the facts without giving a judgment on the people involved (the immigration officers) or the system behind it. I got expelled-deported-exiled-no matter how you want to call it- from a country which I visited regularly.
  • Sixty seconds later: “Hmm, let me re-read the story itself”, I though, as I started to doubt myself. Did I really-really-really report the facts are they were? Did I leave nothing open for miss-interpretation, had I been objective?
  • One hour later, I started to realize, that ‘You Can Not Control How People Read A Story”.. I checked some of the forums where the story was cited, and was surprised – no I was baffled – how some people misread or half-read the post. In the end, I thought “Pffft” (an expression I hold a patent on!): “You can never make things clear enough, or please everyone. And everyone has an opinion about everything.”
  • Two hours later, some comments came in which I thought were rather irrelevant to the post (apart from the usual spam), or which – I found – were direct insults to some people who commented before. Or were plain profanity.. Which comments should I let through, and publish, which ones should I delete? And most importantly, who am * I * to judge? Who am I to limit the ‘freedom of speech’ – one of the things that drove me to write this story (apart from the fact that it was ‘a nice and interesting story to tell?’). Daah!

Blogging Will Get You Fired. - Will It Really?
What have Jan Pronk and Ellen Simonetti, the highest ranking UN official in Sudan and a young flight attendant for Delta Airlines in common? Well, both were fired because of something they published in their personal blog. Kind of. One revealed some facts about the Sudanese government, which did not please them. The other one revealed a bit too much leg in a Delta Airlines uniform, which did not please them (Delta Airlines, that is, not the Sudanese government).
Let me relativate that (not the leg part, but the ‘getting fired' part): I don’t think that only one single fact gets people fired. I am sure there is always a string of events, as
Jan Pronk admits himself. Maybe a blog entry is the last bit, the last drop which makes the bucket overflow.

But one thing, I can tell you: blogging is a *^^!# two-edged sword. In one way, it is great! “Power to the People!”. At last blogging gives a unique platform for people to publish an opinion to the general public. Sure, Internet exists since a long time (Al Gore invented it, right?), but the threshold put by the technical complexity to publish something on The Net was too high for ‘People with Average Minds Like Me’. Nowadays, with FREE blogging software, this threshold is no longer there. Me, myself and I don’t know the first thing about HTML or any of that Technical Internet Stuff, but it only took me half an hour to get my first story on a blog, starting from zilch. (Thanks, All You Good People From Blogger!). Now, if I can do it, anyone can do it.

Batttt, with that freedom of speech also comes a responsibility. A responsibility to ensure what you tell is correct (otherwise label it clearly as fiction) and foremost does not hurt other individuals.. That is my non-exhaustive opinion. Also, one of the responsibilities is to ensure you don’t bite the hand that feeds you. If you are pissed off about your employer, or your working environment, or colleagues, I think other, more direct ways of dealing with it, are more appropriate.

Still, with all precautions taken, some people do get into trouble through their blog. So both the ‘surprise’ success of one of my stories, and the fact that I discovered the story about Jan Pronk and ‘the Queen of Sky” through a post on the Aidworkers Network, made me think:

“My Encounter with the Extremists: To Publish or Not to Publish? That is the Question!”

Normally, I write a story in one go. Each story takes me half an hour, an hour max. And then I sit on them for days, sometimes weeks, to re-chew them, edit them.. I send them to some of my close friends, and listen to their comments. And re-chew some more.

One of the stories I have in the pipeline describes my ‘encounter’ with a grouping labeled as a ‘terrorist organisation’, or at least an ‘Muslim extremist’ organization by most Western governments. It is an interesting story to tell. No world shocking news, but just .. a nice story. The first version had the names of the organization and the country in which it happened, all in it… Then I thought ‘hmm, this is going to get me, or someone else, into trouble.’ I mean, these people – whatever you call them ‘Radicals’, ‘Terrorists’, ‘Extremists’, are NOT the kind of people you want to mess around with. Neither the government of the country all of this happened in.

Learning the lessons I mentioned above, I took out the name of the country in which the story happened. And then stripped out the name of the ‘extremist grouping’. And… was left with a very cryptic and dull story.. Yak! The punch was taken out of it.. Dilemma! Interesting story, but lame because of self-censorship, not making it worth anymore to publish. What to do?


The Rules of Conscientious Blogging.

Jan Pronk quotes the following rules:
  • Present only facts, not rumours or hearsay. Check the facts; don’t make up stories.
  • Present only quotes of public statements. Do not quote what other persons said in official or informal meetings. In references to such meetings only quote your self. Do not breach confidentiality.
  • Present criticism in a balanced manner. Approach all parties alike. Be even handed.
  • Do not attack individual persons. Criticize organizations, institutions or movements. Criticize their values, policies and behaviour, when they are in conflict with internationally agreed principles and norms.
  • Do not only present criticism. Do not only report negative developments. Highlight also positive facts. Do not withhold praise, when deserved.

An article in the Aidworkers Network lead me to some excellent pieces written about ‘Safe Blogging’ or I would call it ‘Conscientious Blogging’ by Reporters Without Borders and the Electronic Frontier Foundation. That made me conclude ‘Yes I will publish the piece about the extremists.’ I just have to “Re-chew a Little More..” :-) Stay tuned..

PS: And I thought this ‘blogging’ thing was going to be a ‘simple few days work to publish some of my stories’, hey? It is an interesting Road, though, we’re walking.
PPS: Were we lucky that Jan Pronk was not fired because he showed too much leg to the Sudanese Government! Maybe Ellen would have done better with the Sudanese Government! Should we propose they swap jobs?

Picture credits: janpronk.nl and queenofsky.journalspace.com


More Blogging "Tips and Tricks", you find here.

Read the full post...
Kind people supporting The Road to the Horizon:
Find out how you can sponsor The Road

  © Blogger template The Business Templates by Ourblogtemplates.com 2008

Back to TOP